Review: Capture One Pro 8

This is a review of Capture One Pro 8.3.2, specifically from the perspective of a long-time Lightroom user, running Apple’s Mac OS and using several different small cameras (the Canon 5D Mark II and III, Olympus E-M5, Ricoh GR, and various film systems). There is also a brief look at how well Capture One handles RAW compression artefacts from Sony’s new A7R II camera.
This is a long post. If you prefer you can jump directly to the conclusion, or to the image processing comparisons with Lightroom. We will also be uploading some of the colour images processed with Capture One next week.
The review grew out of an attempt to understand Capture One better, to determine if migrating away from Lightroom would be feasible, and if so what would be the benefits and/or drawbacks of using Capture One. Usually, it takes more time to scan, import and process photographs than to take them, yet the software used to do this is often overlooked as an afterthought to the camera and lenses.
In making this comparison, Capture One is at a huge disadvantage: I have used Lightroom since version 1.0. Adobe’s quirks, foibles and keyboard shortcuts are by now burned in to my brain, and switching to anything different entails much re-learning at many levels – the overall workflow, the user-interface and the detailed image editing controls. To try to overcome this, for the last month images were processed in both Capture One and Lightroom, with the aim to finding the “best” output in either program and then matching that in the other.
But if Lightroom is so familiar, why change?
One very strong reason is the direction Adobe is taking by trying to lock users to a subscription based model with an increasing dependency on Adobe’s online infrastructure. It seems that Adobe’s engineering effort is expended to maximise customer lock-in rather than to produce the best possible experience for the customer. For example, maintaining the current non-subscription version of Lightroom with fewer features than the CC version actually requires more development cost than simply making them the same. This is bad for users, and something that only a company with a pseudo-monopoly can effectively get away with.
There are other cross-platform alternatives to Lightroom, most notably DXO and Dark Table. However, while these have their own strengths, none seem to have the well rounded combination of Digital Asset Management (DAM) features combined with a leading RAW image processor. For these reasons I have chosen to focus on Capture One as a possible Lightroom alternative.
Installation and Software Updates
Installation of Capture One is straightforward – just download the application and drag the it to your local disk. If you purchase the software normally, an internet connection is only required for registration when the software is first run. Thereafter it operates completely standalone.
Software update checks can be performed either automatically or manually, but crucially any updates are only applied manually. This means that I never have to worry about a background task downloading multi-gigabyte updates while I am on a remote 3G phone connection, and I do not have to worry about my software changing underneath my feet while I am in the middle of a project.
In contrast, installing Lightroom now also installs numerous background tasks whose primary purpose is to encourage you to purchase even more from Adobe. The cloud service is installed in every Finder window, whether or not you wanted it. With a CC subscription, you need regular network access simply to continue to allow the software to run.
Capture One updates come with meaningful release notes and, should anything go wrong, Phase One’s online support that responds quickly and helpfully.
The Capture One User Interface
Capture One uses a fairly conventional user interface for image processing software, which is substantially customisable both in appearance and for keyboard shortcuts.
Unlike Lightroom, the main display is largely un-modal. There are no distinct “Library”, “Develop”, “Print” or other modes, but instead a single window design using three main elements:
- the “viewer” – a central panel that displays the currently selected photo(s)
- the “browser” – which shows a set of photographs that can be selected
- the “tools” – a pallet of controls for image searching, editing and export

The Capture One User Interface
There is also a top-level toolbar that provides short-cuts for common operations, and numerous menu based commands. While the main UI is non-modal, the cursor is not, changing shape to denote whatever the current function is. These functions very much resemble Photoshop’s modal cursor, and are selected in a similar way via a menu-bar.

The toolbar used to change the mouse-cursor function
Each item in the bar has several sub-options, for example offering different constraints for key-stone corrections or different rotation options. As with Photoshop, these can be selected via a key-stroke, and adding the shift-key cycles through any sub-options.
The biggest shock for someone coming from Lightroom is the lack of modules. In Lightroom, there are distinct modules for browsing (“Library”) and editing (“Develop”), each of which has a different display and different key commands. Depending on your perspective, Lightroom’s UI is either a source of constant frustration, or a smart way to make use of small laptop screens. But like it or not, transitioning back to a non-modal UI will be disorienting at first.
By default, Capture One will show all three main UI elements at the same time. At first this seems limiting, but there is a lot of flexibility, allowing elements to be resized, hidden or placed in a different position on screen. As a long-time Lightroom user, the first and most obvious usability problem with Capture One was how to select photographs. Out-of-the-box, all you seem to get is a tiny film-strip that makes finding an image in a large collection extremely frustrating.
The trick is to hide the screen elements that are no required, after which whatever is left will expand to fill the space:


As a laptop user coming from Lightroom, the following keyboard shortcuts were absolute life-savers:
    CMD-ALT-V   Toggle display of the image viewer
    CMD-B       Toggle display of the image browser
    CMD-T       Toggle display of the tool pallet
Showing the browser and hiding the image viewer effectively provides the same functionality as the grid view in Lightroom’s Library module.
The tool panel is also extremely customisable, with the ability to add or remove tabs and individual tools within each tab. All of this setup can be saved as a named custom workspace, to allow rapid switching between different layouts depending on the task at hand – for example, processing black-and-white vs colour.
Catalogues vs Sessions
A hurdle that a new user faces is the choice of whether or not to use a Catalogue or a Session. What a what? I just want to get started!
In fact the choice is easy: use a “catalogue” for general image handling, and a “session” to manage live-image capture with the camera connected to the computer.
Sessions are a unique feature to Capture One, without any obvious counterpart in most other general RAW editor or DAM software packages. They set up a folder structure and workflow optimised specifically for live-capture, where you may take many images that are discarded as you setup lighting and composition.
While sessions are arguably the defining feature of Capture One, I am not going to talk about them further in this review, as I seldom use tethering outside of occasional macro photography. I suspect that this is also true for most non-studio-based users of the software. However, what I would say is that the tethering support in Capture One is an order of magnitude better than most other software packages – and Lightroom 6 appears sufficiently buggy as to be unusable with our Canon 5D Mark III.
Importing Images
Capture One’s image import process is similar, but not as sophisticated as Lightroom’s.
One key difference is the need to select whether the images are stored in a conventional disk folder, or within the Capture One catalogue itself. This is specified by the “Import To” panel:

Capture One’s import dialogue.
When importing to a disk location, you can specify a sub-directory name and also rename the imported image using meta-data from the imported files. In the example above, the imported file will be copied to a subdirectory outside of the catalogue, based on the capture date.
It is important to note that once a file is in a catalogue, it is difficult to move it out. There is a “rename” command in Capture One that allows a file to be moved whilst retaining its connection with any edits that were made, but inexplicably this lacks the ability to specify a sub-directory based on meta-data – making it painful to replicate patterns that are possible when files are imported externally to the catalogue.
Compared to Lightroom’s import dialogue, I found that there were two key features I missed.
The first was the surprising inability to import directly from an attached Canon 5D, which uses the USB MTP rather than mounting as a disk. This means that to import images from the Canon I either need to find a CF card reader, or use Apple’s “Image Capture” program to copy the files to disk before they are imported to Capture One. Although not the end of the world, this is obviously much less smoother than in Lightroom, which will import the files directly from the attached camera.
The second missing feature is the inability to apply arbitrary keywords during an import. It is possible to apply some very basic data, such as copyright and a description, and it is also possible to apply preset styles that can contain keywords. But a simple dialogue box in which I can type a list of new keywords to apply to the imported files? No. This would matter a lot less if the key-wording within Capture One worked smoothly after import – but more about that later.
A short digression: the Catalogue File is in fact a disguised disk directory (in MacOS terms, a package file). In the Mac Finder, if you right-click over the catalogue, you can open a window and browse the contents that are normally hidden:

Inside of a Capture One catalogue file…
You can see here that the main image edits are being stored in an SQL file (*.cocatalogdb), but any files that were imported remain as distinct files along with other large objects, such as edits masks (more on these later).
This is an excellent format to use, for several reasons. Firstly, if there is ever a disaster and Capture One can no longer open the catalogue, you should still be able to recover the original images. Secondly, it is extremely backup-friendly, because the SQL data can remain relatively compact as larger objects are stored separately. With Lightroom, any image masks (more on this later) are stored within what quickly becomes a very bloated single database. As a result, our main Lightroom catalogue is nearly 1GB in size, and any trivial edit results in the entire object being backed up. That should be much less of a problem with Capture One.
One unwelcome surprise was that Capture One refuses to import the grayscale TIFF images that my scanner produces from black-and-white negatives. Capture One support indicate that this is a known issue with the software, and may (note “may”) be fixed in a future version. As a work-around for this, you need to ensure any TIFF files are encoded as RGB and include a colour profile. Unfortunately, the only viable way that I have to do this is to use Photoshop.
Capture One also offers the ability to import from existing Lightroom (or Aperture) libraries. This has the advantage that any key-wording will be preserved, but unsurprisingly most image edits are not accurately reproduced. Unfortunately for me, this resulted in 3/4 of this years images being omitted due to the grayscale TIFF issue. It is also worth noting that Capture One will also fail to import many other image types that you might have expected to work, such as PNG.
The Initial Image Cull
After importing a new set of images, the first thing that I normally do is to delete the images that are obviously unusable – for example images with poor focus or exposure errors.
In Lightroom, I quickly run through the imported images, using SHIFT-X to mark unwanted images as rejected. When done, CMD-BACKSPACE will delete the flagged images. Images that are particularly interesting are marked using the ‘pick’ flag.
In Capture One, there is no directly equivalent functionality. You have the following possibilities:
- the ability to add star-ratings to images
- the ability to add colour tags to images
- the ability to quickly add selected images to a collection (“Selects” – roughly equivalent to Lightroom’s Quick Collection)
I opted to use the colour tags to flag images as rejected (red), particularly interesting (green) or useful but not worth editing immediately (no colour).
Some simple customisations make this work-flow easier. Firstly, I have assigned key-shortcuts to tag an image with an appropriate colour (using ‘p’ and ‘x’ for green and red, mimicking the pick and reject commands in Lightroom).
Secondly, I use the smart folder system to group images based on their colour tag. Smart folders contain images based on their meta-data, so I can set up three folders corresponding to all images that are non-rejected (not red), all picked (green) and all rejected (red).

Using colour tags to mark images as rejected…
All in all, this works well for me. However, it is disappointing that there is not a direct equivalent of Lightroom’s “Reject” flag. It is possible that the software designers intended the “Trash” folder to be used for rejected images. Unfortunately, the implementation of the trash folder is broken if you choose to keep your images outside of the catalogue file – it sends files directly to the Mac OS Trash rather than to the Trash in Capture One’s Catalogue Collections (see the image above).
Capture One provides organisational equivalents to essentially all of Lightroom’s DAM functions, with manual and smart albums (Lightroom’s collections and smart-collections), the ability to organise collections of albums, and the ability to import and export catalogues. Searching and filtering also match Lightroom’s capabilities, although the different user interface means that it takes some time to learn to use this efficiently.
Capture One also has a couple of useful tools to assist in the initial cull, neither of which exist in Lightroom.
Firstly, there is a useful “Exposure Evaluation” panel, which shows the histogram together with a simple estimate of whether the photograph was under or over exposed. Secondly, there is a “Focus Mask” overlap that highlights areas of in-focus detail in a lurid colour of your choosing.

The exposure evaluation tool and focus overlay (here shown in green).
In the rather contrived example above, Capture One has decided that the image was about 1/3 stop underexposed, and the focus plain is shown by the line of green highlighting running across the sign. This also shows one of the limitations of the focus detection, in that it needs detail in the subject to work (so we see more highlighting in the white arrow than in the less-contrasty blue surround).
You can also show shadow and highlight clipping, and there are preference settings for the sensitivity of both the clipping points and the focus detection.
It is also possible to show several images side-by-side, similar to Lightroom’s Survey mode. All you need to do is select the required images in the browser, and the rest is automatic.
Default Image Rendering
On initial import, images from Capture One look noticeably better than in Lightroom. They show a subtly better colour and generally more “pop”. Many online reviews attribute this to a better RAW processing engine in Capture One, but in reality the difference is mostly due to a combination of different default settings and differences in the colour profiles.
The following screen captures show this with two images that have been imported using only the default settings:


The Lightroom image looks less punchy, but adjust the black level, shadows and colour temperature and the result is practically indistinguishable from Capture One. The two programs seldom seem to agree on the colour temperature indicated in the RAW file, and unsurprisingly auto-white-balance gives very different results. Ultimately, if you need accurate colour then you will need to use a calibrated target to determine settings.
When pixel-peeping, at first it seems as if Lightroom gives substantially more detail. The following two images are 400% crops from the center of an image shot at f7.1:


As before, Capture One shows punchier colours by default – but it also lacks detail in the texture on the painted wall and stone surfaces. However, it turns out that Capture One has applied a fairly substantial amount of noise reduction while also ramping up sharpening. Turn the luminance noise reduction to zero to match Lightroom, and the level of detail becomes essentially identical:

400% crop from Capture One with Noise Reduction reduced.
There are numerous other differences when pixel peeping at this level, but generally they are small enough that with appropriate adjustments you can make Lightroom and Capture One’s rendering for all practical purposes identical.
It is also easy to change the defaults in Capture One – just click on the three-dots symbol at the top right of any editor panel and the pop-up menu allows the current settings to be used as the default for future imports from the same camera type. Aside from the default level of noise reduction, generally I found the default rendering (with a Canon 5D Mark III) a better starting point than from Lightroom.
Basic Image Editing and Image Quality
Basic image adjustments follow the familiar model of exposure, brightness, contrast and saturation, while additional “High Dynamic Range” settings can be used to compress highlights and shadows. I think that the latter are somewhat misnamed, as their functionality is essentially the same as Lightroom’s “highlights” and “blacks/shadows” sliders.
The “auto-adjust” seems to work considerably more reliably than the equivalent in Lightroom (this is not a difficult bar to reach!), and adjusts both exposure and white balance. The following two images show the output following import and auto-adjust in Capture One and auto-levels/auto-white-balance in Lightroom:


The results are very similar, except that Capture One tends to crush the black-level in order to make the image “pop” (look at the left-side of the histogram), while Lightroom tends to over-expose. After editing several hundred photographs, the auto-adjust in Capture One appears to work fantastically for about 80% of my images, saving time by providing a solid starting point for further editing. This is a definite advantage over Lightroom.
By editing the exposure setting, levels and white-balance, it possible to almost completely recreate the Lightroom result in Capture One:

Similarly, it is possible to adjust the Lightroom settings to approximate the Capture One output:

However, it was non-trivial to obtain this from Lightroom. Aside from adjusting the luminance profile, matching the colour required edits to the colour temperature, the camera profile and also to the level of yellow saturation. Even having done so, it is not a perfect match and I think that Capture One is still pulling richer and more varied colour from the foliage.
Perhaps this should not be surprising, as Capture One’s colour controls are significantly more capable than Lightroom.
While Lightroom provides a “vibrance” slider (essentially saturation while minimising changes to skin-tones) and an HSL-based colour adjustment tool, Capture One provides several panels dedicated to colour control, including distinct adjustments based on shadow/mid/highlight areas. And while Lightroom provides eight predefined colour channels that can be edited, Capture One allows editing of arbitrary zones of colour and luminance, allowing much greater control and precision, and the resulting configuration can be saved as an ICC profile for use in other software.


The user-interface for colour control looks frighteningly complex after coming from something simpler, but with a little experimentation it soon becomes clear how the various sliders and colour wheels function. There is even a dedicated panel for fine-grained skin-tone correction. The following screen-capture shows the use of the colour editor to adjust the tone and saturation of some plums – the sections of the image that will not be affected by the edit are shown in black-and-white:

Adjusting the colour of plums…
Another notable difference is in the clarity and sharpening settings. At first glance, Capture One’s sharpening options look more limited than Lightroom, lacking Lightroom’s “Detail” slider. However, this is compensated by a more sophisticated clarity tool, which provides large and fine-scale (“Structure”) clarity adjustments. In use, the Capture One tools seem to work better, providing finer control without generating the over-cooked look that comes from using too much clarity in Lightroom.
The following screen-captures show a 400% enlargement of the same image, processed in Capture One and Lightroom respectively to try to correct a very soft image via sharpening and clarity:


The image was taken with the 50mm f1.2L wide open, and the spherical abberation from the lens is softening the image. The difference is dramatic, with Capture One able to achieve a relatively clean and natural look, while Lightroom looks like a watercolour painting with poor detail and significant haloing.
While this is an artificial example (if I wanted a sharp image, I could have stopped the lens down…), I think that it does illustrate the additional flexibility and image quality that Capture One provides when image conditions are not ideal.
This flexibility and precision shown by the colour editor and clarity controls extends to pretty much all of Capture One’s tools, and with only one exception (high ISO noise – below), I was unable to find an example of an edit that could be performed in Lightroom either with more flexibility or with better output quality.
Colour Management
I am not going to say very much about colour management, as I do not yet have enough experience with Capture One to evaluate how well it assesses colours.
Capture One provides a clear colour management system, which allows either a fixed colour output profile to be chosen, or to have a profile selected on the current output recipe. Unlike Lightroom, there are not distinct exposure and gamut (soft proofing) warnings. Instead, the “exposure warning” highlights not just luminosity, but also out-of-range colours. You can mouse-over the following image to see the out-of-range highlighting for an sRGB profile:

As you would expect, there are options for perceptual, relative-colourmetric and absolute-colourmetric rendering intents, as well as a slightly mysterious “saturation” option which allegedly is to give more saturated (but unrealistic) output for business graphics. The UI for managing all of this is encouragingly straightforward compared to Lightroom’s rather quirky soft-proofing mechanisms.
Comparing screen output between Capture One and Lightroom suggested that the two programs produced very similar output with the colour checker card when using white balance selected from a grey colour patch. And unlike auto-white balance, both Lightroom and Capture One reassuringly agreed on essentially the same temperature and tint for the same image.
I will write more about colour management when I have more experience of working with Capture One and have had time to assess some print output.
Black and White Image Conversion
Unlike the superb colour controls, black and white toning in Capture One at first feels like an afterthought.
There is only one panel, with two tabs providing a basic colour mixer and crude split-toning. There are fewer colour channels than in Lightroom, no “dropper” to assist editing, and no means to adjust the central point for the split toning.


However, unlike Lightroom, the standard colour controls continue to operate while in black-and-white mode – providing substantially more flexibility than the black and white control themselves imply.
For example, to darken a specific tonal range, first select the appropriate colour editing tool. Then use the eye-dropper to select the tonal area to edit from the image, adjusting the range using the colour wheel in the editor panel. Once the range is selected, the sliders (most obviously the lightness control) can be used to control the corresponding black-and-white toning with more precision than is possible with Lightroom.
The downside to this is that processing images is somewhat unintuitive and less convenient than in Lightroom. I suggest that a typical black-and-white workflow could use the colour sensitivity sliders in the dedicated Black-and-White tool panel to define a colour filter, leaving the Colour Editor and Balance tools to perform image specific fine adjustment.
Layer Cake
Capture One has a local adjustment model similar to that used by Photoshop, where layers are applied over the image to effect changes.

A layer mask was used here to darken the environment around the snail.
Three types of layer are supported:
Adjustment Layers — used to apply any image editing locally
Cloning Layers — used to replace areas of an image
Healing Layers — used to replace areas of an image
Somewhat confusingly, the adjustment layer type is sometimes in the UI just named “Layer”, without any qualifier.
A layer is characterised by a mask that specifies the location and intensity of the effect, and various parameters that specify how the mask modifies the image. Unlike Photoshop, layers do not themselves contain image data and there are therefore no options to control how layers are blended – each layer simply operates on everything beneath it. Up to 16 layers can be created in total.
The layer mask can be edited with brush, erase and gradient tools, and is usually shown only when drawing.

Image showing a layer mask made with the gradient tool.
The brush and erase tools work just like you might expect, allowing fine control over the mask area much as you might do in Photoshop. Right clicking on the image brings up a menu that allows configuration of the brush size and hardness, and also an ‘auto-mask’ option to assist with difficult edits, and you can use a graphics tablet for finer control. In the limited testing so far, the auto-masking option does not seem work at all – another bug?
The gradient tool generates a linear gradient in the mask. Unfortunately, it also completely erases the previous mask content. This seems oddly limiting. I often combine several linear gradients in Lightroom to adjust lighting, but as improbable as it might seem this does not appear to be possible with a single layer mask in Capture One.
Adjustment Layers
Most of the normal image editing tool panels can be used with an adjustment layer, with the exception of the curves or grain tools. The latter is somewhat odd, given that the out-of-the-box “Local Adjustments” tool panel includes the grain settings even though they can not be used – I suspect that this is just a bug.
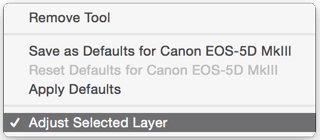
To determine whether or not a given panel affects the whole image or just the current layer mask, click the three-dots above the top-left corner of the panel. The pop-up menu will show “Adjust Selected Layer” and the settings shown will then apply to the currently selected layer rather than to the whole image.
 For most local edits, this work very well and a few layers cover most usage:
- a layer for dodging
- a layer for burning
- one or more layers for local colour adjustments (eg local white-balance)
- one or more layers for local clarity, noise reduction or sharpening
Unlike Lightroom, these local edits are stored as a literal image mask rather than as a series of editing commands. This helps keep the per-image data as small as possible, and also avoids the tedious UI slow-downs that are seen in Lightroom when a particularly complex set of local edits are created.
Cloning and Healing Layers
I use a lot of spot-removal and cloning when editing film images. The scanning process appears to be the world’s largest dust magnet, and so I had hoped to be able to use the cloning and healing tools in Capture One to correct for this.
Unfortunately, Capture One’s cloning and healing layer implementation is unusable for anything but the most trivial edits.
The problem arises because Capture One layers contain only an image mask, and not image data. As a result, each layer can support only a single edit. The mask specifies the area to be replace, while a single control point specifies the source.
Although you can make the area to be cloned or healed as large or as complex as you like, the limitation to only a single control point means that it is next to impossible to find a suitable donor image area for anything but the smallest changes. This makes fixing larger scratches or dust patches in film scans completely impractical.

Capture One’s less than useful image cloning/healing tool.
The difference between cloning and healing appears to be the way that the replacement area is blended with the image. However, neither mode seems to give anything remotely close to the seamless blending that is now taken for granted in Lightroom or Photoshop.
My impression is that the cloning/healing system implemented in Capture One is basically unusable, and you have to wonder why such an embarrassingly poor and almost largely pointless implementation was included in what is otherwise an excellent piece of software. This stands in stark contrast to the excellent – if slightly slow – tools that are now included with Lightroom.
Spot Removal
So, if layer-based cloning and healing are no-go, perhaps the dust-spot removal tool can fill in?
Well, not really. If all you need is to remove a minor spec of dust from an image, then the tool is usable. But if any significant level of patching is required (or if your dust spots are actually small pieces of lint, and not perfectly circular…), then again you need to look elsewhere.

Capture One’s spot removal tool.
It is not quite as unusable as the cloning and healing layers, but again the implementation leaves very much to be desired when compared to the far more flexible system implemented in Lightroom, which has no limitations on the shape or size of the patched areas. It is certainly not a substitute for a proper cloning/healing mechanism.
Working with Multiple Images
Capture One allows several images to be shown in the main viewer area, simply by making a selection in the browser:

Working with multiple photographs.
These can be zoomed and panned either individually or together, giving a practical way to make comparisons when culling or selecting photographs. The system works much like a combination of Lightroom’s “compare” and “group” views.
Capture One’s terminology is confusing, partly because it insists on using the term “variant” rather than something more obvious, such as “image” or “photograph”. The following get used:
- variant
- an image
- clone variant
- a virtual copy of an image, allowing different edits to be applied to the same RAW file
- primary variant
- the image that you are operating on (shown with thick white border in the image browser)
- selected variants
- the currently selected images (the primary variant plus others shown with a thin white border)
You can choose to view either just the current primary variant or up to 16 selected variants shown side-by-side.
Any settings that you might change in the various tools panels affect only the primary variant. To apply edits from one photograph to others you need to copy and paste the settings.
There are a couple of ways to copy settings. The most obvious is to simply copy all settings via the “Copy Adjustments” menu command, but you can also copy specific settings by clicking on the (tiny) double-headed arrow icon in any of the tools. By default, this will show a pop-up menu that allows you refine exactly which settings are being copied. Once the settings are copied, you must apply (paste) them to another image. The target of the paste is always the current “primary variant”, but you can optionally apply the settings to all selected images (sorry, “selected variants”) by ensuring that the “Edit All Selected Variants” menu option is enabled.
The “Edit All Selected Variants” menu option is another example of badly confusing terminology. When this is selected, any edits you make to the image settings surprisingly do not automatically update all selected images – they only ever affect the current “primary variant”. Instead this option is meaningful only when pasting settings (sorry , “applying settings”).
I think that this is very confusing. Almost always when I paste settings I want to paste them to multiple images. It would be much more straightforward to simply make this the default behaviour for copy/paste and remove the “Edit All Selected Variants” toggle completely.
An example of the confusion that this causes: the UI helpfully provides a quick copy-and-paste-immediately mechanism (by SHIFT-CLICKING the double headed arrow in a tool). Unfortunately, this will unhelpfully and silently do absolutely nothing unless the “Edit All Selected Variants” option is enabled.
Another example of where this causes problems is when applying keywords to images. You might naively expect that, unlike image settings, keywords would be applied to all selected images automatically – particularly if “Edit All Selected Variants” is glowing bright orange in the UI. Unfortunately not.
Keywords are applied to images in exactly the same way as image adjustments. This is problematic, because it means that the only way to apply a keyword to multiple images is via copy and paste – and pasting means that any previous keywords on the target images are lost. For example, suppose that I have already carefully applied individual keywords to a set of images, but want to go back and add a single keyword (such as the location) to a large selection. This is actually impossible to do safely with the current keyword UI in Capture One without editing each image individually.
There is a partial work-around for this, by selecting and dragging images to a keyword within the “Filters” tool panel. However, this is very non-obvious (the Filters panel is used to control which images are shown in the browser, not to change them, and is not even shown by default in the keyword tool tab!).
Getting Output from Capture One
Usually, I have three distinct types of output:
- exporting to the blog
- exporting standalone images to send via email or disk
- printing
It is important to select an appropriate colour profile, based on the range of colours that the output medium supports. The colour proofing system will then show how the final output will look, and warn about colours or intensities that can not be shown accurately. Unfortunately, the same RAW file proofed using the same colour space and rendering intent shows very different gamut warnings between Capture One and Lightroom, presumably due to subtle differences in processing. Until I have a chance to make some test prints from Capture One it is difficult to assess how well the colour management works.
Printing
Print output is handled by a simple print dialogue. This has options to generate single or multiple images per page, with programmable margins.
Although the dialogue seems simple, it appears to offset essentially the same functionality as Lightroom, and can be used for anything from printing sheets of passport photographs to large exhibition images. There is not much to say here: it basically just works.

Exporting Images
Images can be exported to disk in one of two ways.
The first is to simply use the “Export Images” command from the menu, which allows either the original image or an edited version to be exported. This is as simple and direct as it sounds.
The second option is to use the “process recipe” system in Capture One. A process recipe is simply a set of directions describing how the output file should be generated: it’s size, image quality, watermarking and, lastly, any program that the output should be sent to on completion. The system is extremely flexible and multiple recipes can be automatically executed on the selected images (for example, generating web and print versions automatically). If anything, this feels over-engineered, particularly since the results can only be sent to local disk storage, and not (for example) automatically uploaded to online services.
Process recipes are equivalent to Lightroom’s export dialogue and provide broadly similar functionality. The most obvious problem with Capture One is the lack of plug-in support. In Lightroom, I use LR/Mogrify2 and LR/Blog to automate the watermarking and uploading of images to the blog. Unfortunately, such third-party plugins are not available to Capture One – although it probably would not be very difficult to write an application to replace the missing functionality.
Multi-Monitor and Pen-Tablet Support
Multi-monitor support is always useful when editing images. I use a laptop, docking it to a 27″ monitor when not travelling.
Capture One’s workspace concept works well in this case, as it is possible to save tool and window layouts corresponding to the current monitor setup. Multi-monitor support is as simple as just creating a new viewer window and positioning it on the second display. When everything is setup to your liking, save it for quick recall for whenever you next need it. This is much easier to use and also more customisable than Lightroom’s hard-coded implementation.
If you need even more screen estate, the free tablet application “Capture Pilot” can be used as an external wireless display, with touch commands to select and rate images. There is also an in-app purchase that allows the application to be used as a wireless controller for tethered image capture.
When not traveling I also usually connect a pen-based tablet, which I use both to drive the software and to edit image masks.

Capture One’s Brush Settings Dialogue.
Capture One worked straight-out-of-the-box with our Wacom Intuos 5, both with pen and touch working. You can also customise the Wacom software to issue editing commands, although given the limited pixel-based image editing options these are probably unnecessary.
Pen pressure can be used to control the brush size when editing image masks, although the tools surprisingly lack any equivalent to the “flow” parameter that both Lightroom and Photoshop use to help control the intensity of the brushwork.
Conclusion

Capture One taken on its own is a capable software package that can organise and edit large numbers of single images, with very high quality output.
During testing, I saw no crashes or data corruptions, and performance was generally very good even without using the GPU assist options.
Overall, the image quality from Capture One matched or exceeded the best comparable output that I could manage from Lightroom. This is particularly true for images with strong saturated colour channels (especially red), or where significant noise reduction or micro-contrast enhancements are useful. It also appears that artefacts caused by Sony RAW compression are handled significantly better than with Adobe.
Capture One’s colour output and controls are excellent, giving both higher quality (tonal variation) and finer control than from Lightroom. This was true both for skin tones and also for landscape colour. In part this is because Capture One behaves much more consistently with different cameras – unlike Lightroom, which gives great results with the Canon 5D, but somewhat less great results with some other cameras.
Another major positive for Capture One is the quality of the auto-adjustment. While this obviously will not work perfectly for all possible images, in most cases it gave an excellent near-final result. In contrast, Lightroom’s auto-levels and auto white-balance are rarely usable.
The only area where Capture One underperforms for image quality is with shadow noise in high-ISO images. It can be quite fiddly finding appropriate settings for the noise reduction, clarity and sharpening that minimise noise without causing unsightly pattern effects and sudden de-saturation of colours. It is perhaps because of this that Capture One by default applies a very high level of noise reduction, with strong sharpening to compensate for detail loss. These defaults work reasonably to cover up the deficiencies of systems with smaller-sensors, but can also look very artificial at lower ISOs or with higher quality sensors. Fortunately, it is possible to override them on a per-camera basis.
However, it is important to remember that most of these image quality differences between Capture One and Lightroom are very small. Usually they will only be visible at high magnifications, very large print sizes or with very extreme processing.
The layer-based adjustment model also works well for local adjustments, giving substantially more flexibility than is available in Lightroom. A major plus for the implementation is that each layer mask is stored as a separate file within the catalogue, avoiding potential problems with incremental disk backup performance as the number of edited images grows.
There are a couple of areas where Capture One falls down a little.
The first problem is the work-flow. Being unable to directly import images from a connected Canon cameras is disrupting, as is the inability to automate online upload of processed images. However most other work-flow “problems” that I initially hit really stem from the fact that Capture One simply works in a different way to Lightroom: once you get used to this and set up the software to use a catalogue structure and shortcuts that make sense for you, it is actually faster and easier to use for image editing.
Here I think that Phase One could do a better job to encourage new users switching from Adobe. It is not sufficient to simply provide an import function for Lightroom – you also need a guide to provide a smooth transition for use of the new software. Unfortunately, the online documentation is currently not very helpful here, particularly where terminology or the quirky key-wording system initially make it difficult to see how to use the software well.
The second major problem is the layer-based cloning and healing editor. This is for most practical purposes, unusable and ill thought-out. This is unfortunate because it forces you to use other software (Photoshop) if, for example, you need to “de-fluff” film scans.
Phase One has an interesting problem following Adobe’s switch to a subscription model, which bundles Lightroom and Photoshop together. Previously, Capture One could compete with Lightroom directly, falling back on Photoshop for when needed. Unfortunately, now if you subscribe to Photoshop, you implicitly subscribe to Lightroom as well. Many people will therefore find it difficult to justify the additional expense of a purchase or subscription to Capture One.
Ultimately, Phase One will need to address this head-on, by providing more Photoshop-like functionality directly within their software. Whether or not it is possible to usefully do this depends on how most people use Photoshop. Many users such as myself rely on only a small number of features (for me: cloning/healing, panoramas and focus stacking), and it may be possible to fully provide these features within a future version of Capture One. Unfortunately, Capture One’s current layer-based cloning and healing tools raise serious questions as to whether or not Phase One has the engineering resource or expertise to achieve this.
So is it worth migrating from Lightroom to Capture One? As always, the answer depends on what your priorities are.
If you only upload to the web or Facebook, then the answer is probably not. All the pixel-level acuity and pin-point colour in the world is pointless if everything is downsized and then shown on a non-colour controlled display, and Lightroom provides a far smoother workflow for online output.
On the other hand, if you need to extract the best quality pixel-level detail and the best possible colour, then Capture One is an excellent choice. This is particularly true when correcting images with poor lighting or slight softness, but it is also true if you use cameras with smaller format sensors that typically have lower resolution, lower micro-contrast and more noise (somewhat ironic, given that Capture One is mainly developed to support Phase One’s medium-format cameras).
As an experiment I am going to try using Capture One as my primary DAM and image editor for at least the next few months. This will be supplemented by an ageing copy of Photoshop CS6, to fill in the gaps and to patch up any files that Capture One failes to open. Time will tell if this was a sensible decision, and whether or not Phase One can eliminate my need for Photoshop before I have no choice but to upgrade to Adobe CC.
Summary
Shamelessly stealing from Ars Technica:
The Good:
- best-in-class image quality (noticeably better than Lightroom or Photoshop at low ISO and when well exposed)
- superb and easy to use colour controls
- excellent default image processing settings
- many settings offer more control than Adobe RAW (eg clarity, shift-lens corrections, the black-mid-white point controls, etc)
- logical and highly customisable user interface
- flexible lens corrections that allow control over normally hard-wired micro 4/3 settings, and which also support shift lenses
- best-in-class tethering support (if you need it)
- it is not Adobe…
The Bad:
- bugs in grayscale TIFF handling prevent direct processing of black-and-white film scans
- the near useless cloning/healing tools
- grain and colour noise reduction artefacts in shadow areas, particularly at high ISOs
- the lack of multi-image tools (panorama, HDR, focus stacking)
- a less than smooth workflow (no USB MTP import, no third-party plug-ins for online output)
- it is not Adobe…
The Ugly:
- if you need to rent Photoshop to fill in missing functionality, you get Lightroom bundled as well…
If you want to try it, Phase One offer a 30 day free trial.
Read the Detailed Image Processing Comparisons between Capture One and Lightroom »
Categories: Photography, Reviews

4 Comments »