Sharpening 35mm Film Scans in Capture One
Having just processed and scanned a new batch of four colour films, I am struggling again with how to get the best possible detail out of the scans. To understand how well the scanning was working, I use a reference macro image of the negative to check the sharpening applied in Capture One.
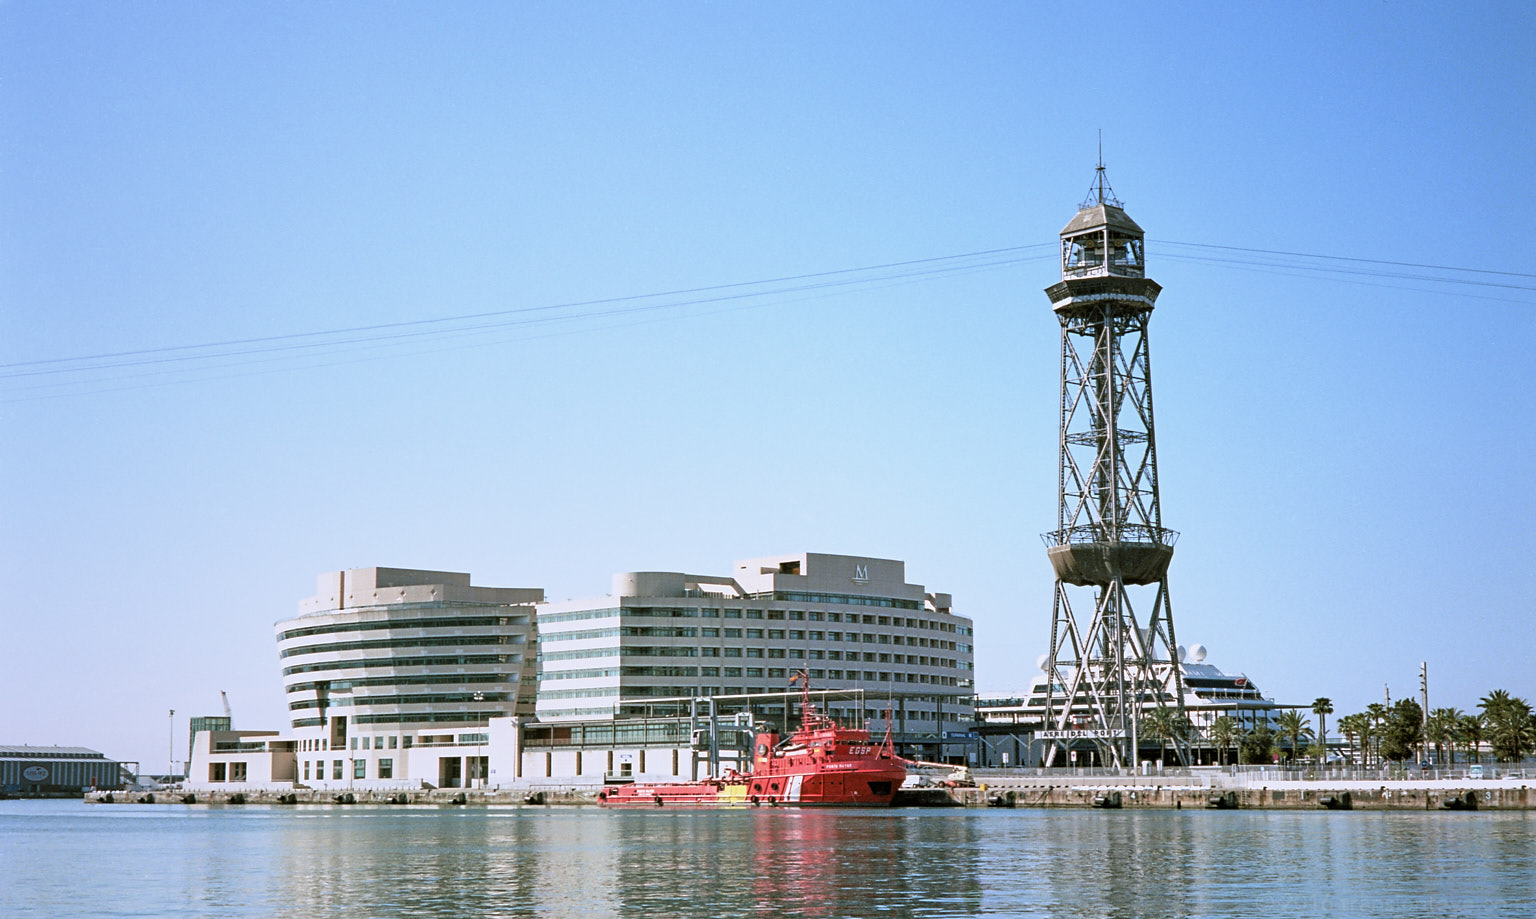
The rather touristic original picture (above) was taken in full sunlight using Ektar 100 with a Leica M7 and Zeiss ZM 1,5/50 C-Sonnar lens. Wide open, the Sonnar is quite a soft lens – but shot here at f11 it should easily out resolve the film and give enough depth of field to cover any focus calibration problems. The film was processed at home using a Tetenal C41 kit and then scanned using an Epson v850 flat bed scanner at 3200 DPI using Epson Scan with all corrections and sharpening disabled. The final image ended up at 4437 x 2656 pixels, or a shade under 12 mega pixels.
 The macro photographs of the negative were taken at 1:1 using an Olympus E-M10 with 60mm macro lens focused using a sliding rail. The 2x crop factor inherent to micro 4/3 means that the these are equivalent to a complete full-frame image with 60MP resolution (the handicap being that each macro image only captures 1/4 of the negative). These were then imported to Capture One for processing, using the standard E-M10 settings except for inverting the luminance curves and adjusting the levels to generate a positive image with similar colour to the Epson output. The auto-adjust in Capture One’s “Levels” tool work unexpectedly well for an initial stab at getting this right.
With both images in Capture One, the sharpening, clarity and noise reduction settings were adjusted to match the film scan to the macro image as closely as possible. The clarity settings are particularly useful because the “structure” parameter works effectively as a means to fine-tune the sharpening, and the settings can be saved as a preset or style for reuse (click here to download the settings used in this example).
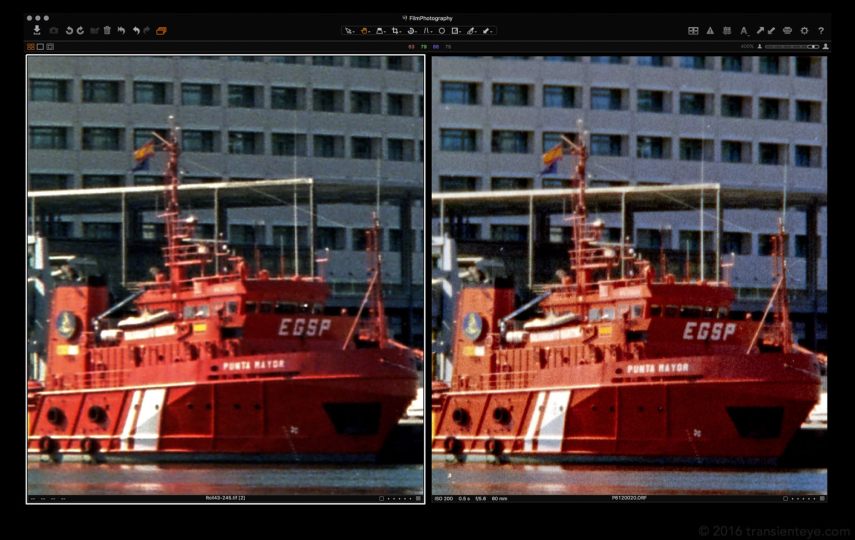
Here are two comparisons showing the original (unsharpened) scan vs the final processed result. Keep in mind that these are ~400% views of the original scan – a level of pixel peeping that is usually best avoided:
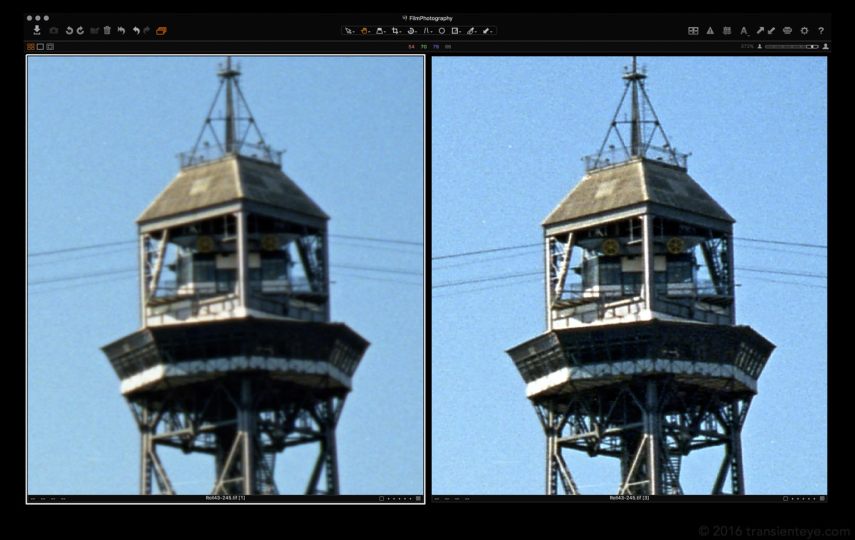
Initial Scan (left) vs Sharpened (right)
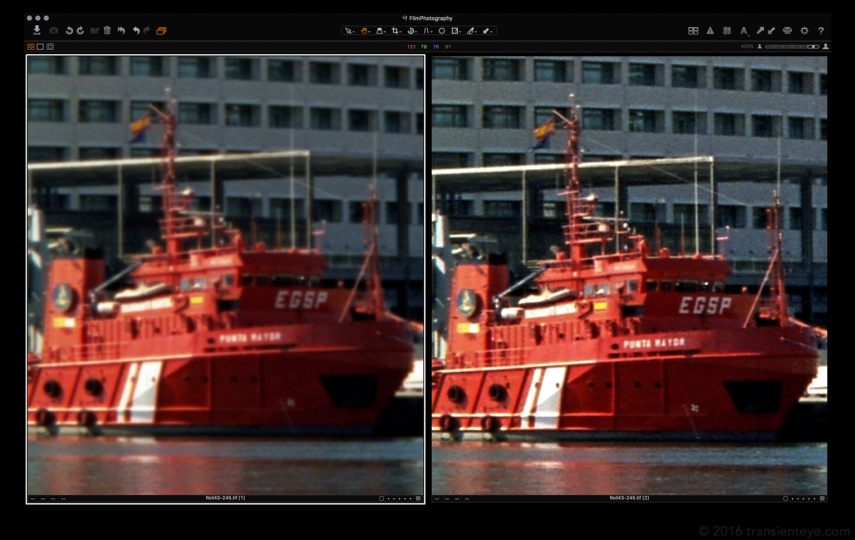
Initial Scan (left) vs Sharpened (right)
Unsurprisingly there is quite an improvement over the unsharpened image, and it is possible to apply quite heavy levels of sharpening without trouble.
Previously, I have probably erred on the side not using enough sharpening, but having the macro shots as a reference helped find settings that gave a result as close as possible to the actual negative as possible.
Here are the same crops, this time showing the processed and the macro images respectively:
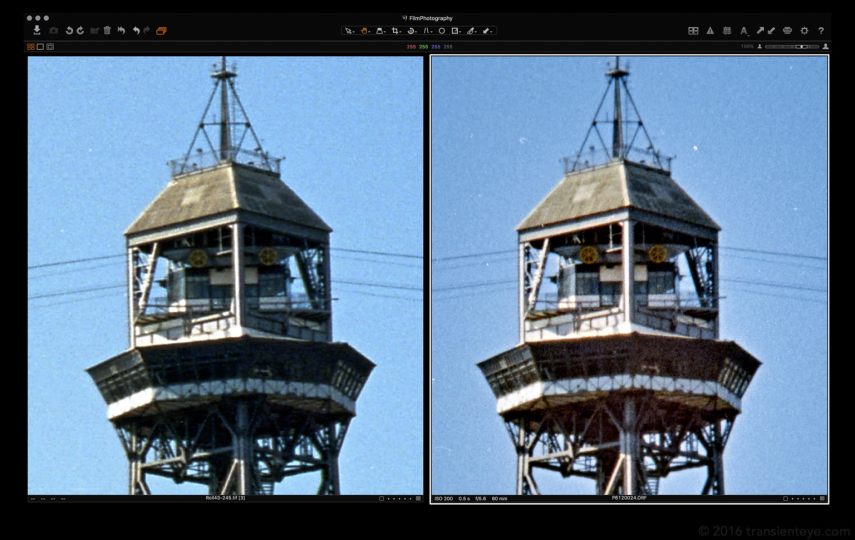
Sharpened scan (left) vs Macro (right)
Sharpened scan (left) vs Macro (right)
To my eye, the macro photograph carries just a fraction more detail than the 3200 DPI scan, but it is pretty close.
The most obvious difference is that the macro more clearly resolves the blobs of dye on the negative, and it is these that appear to limit the final resolution. Here is a crop that shows an area of 3x2mm on the negative – roughly equivalent to looking at at a print 2m wide:
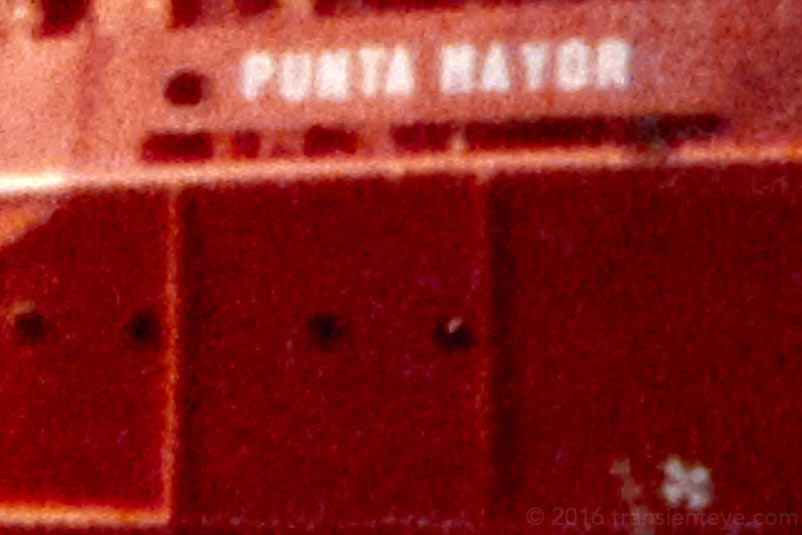
Macro image showing a 3x2mm crop from an Ektar 100 colour film
The film negatives appear to have image perceptual detail roughly equivalent to a 10MP digital camera, and the flat bed scans are pretty much capturing all of that successfully. However, for extreme enlargements where you want to see the film grain itself there is clearly benefit to using a higher resolution scanning process.
Categories: Photography, Technique
