Barcelona Colour
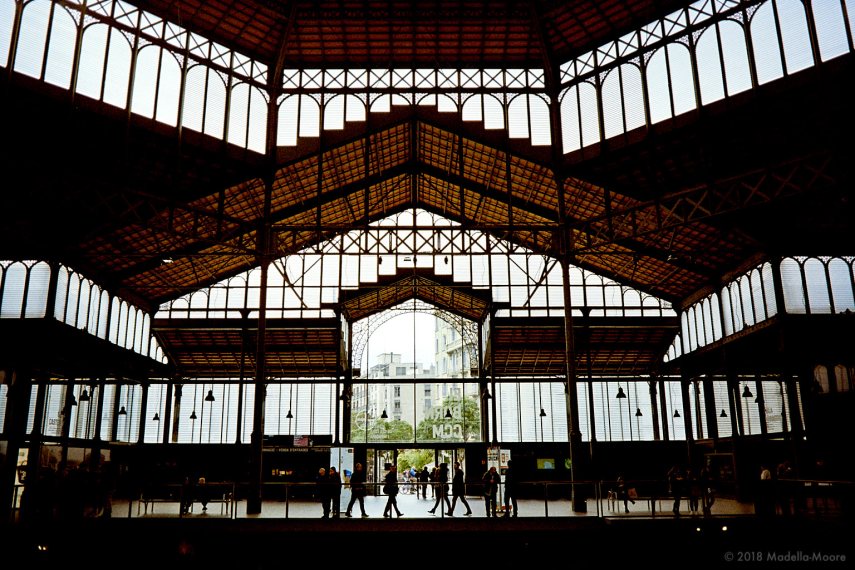
A set of colour film images, shot on Kodak Gold 200 and processed at home using the Tetenal ColorTek C41 kit. These were intended to clear the pipeline for a future project, checking both the characteristics of the film and developer, and also the scanning and subsequent colour correction.

The film was processed as part of a block of four at 30c, the lower of the two recommended temperatures for the Tetenal kit. This makes the developing time a manageable 8 minutes, which helps reduce the error that results from the ten seconds or so that it takes to pour the chemicals in or out of the film chamber. Temperature was maintained using a water bath – a bucket full of water that was heated using a CineStill TCS souse-vide. The CineStill TCS is, incidentally, excellent and maintains the temperature precisely when checked with a precision thermometer.

The results are much grainier than I had expected, and certainly significantly more so than the Ektar 100 I would normally choose to shoot if trying for the absolute highest image quality – not surprising given the much lower cost of the film. I think that it is perfect for a 1980’s lo-fi feel to the images.

The film was “scanned” by photographing the negatives using a macro lens. I find that this method is both faster and gives better results than using a dedicated scanner – but the downside is that there is no easy automated way to correct the colour for the film with the software tools that I use.

Correcting colour – particularly to remove the orange mask – is always something of a matter of guesswork without a reference colour chart. Everything from the exposure through to the lighting, the chemical processing, the characteristics of the film and the software used to process the scan affect the way that colour is rendered. Corrections are inherently subjective, particularly when allowing for perceptual rendering under artificial light sources (this film is optimised to give realistic perceived colours under normal daylight).

The colour correction “workflow” that I use in Capture One is as follows:
- Invert the negative using the Curve tool’s RGB pane.
- Use the white-balance tool using a part of the image that should be a neutral grey.
- Adjust contrast using the Exposure/Contrast control and/or the Curve/Luma control.
- Fine tune the colour using the individual Red, Green and Blue panes in the Levels tool.
The last of these is the most subjective, but with some practise you can learn to spot colour casts in the shadows and highlights and adjust the levels settings to compensate. Whether the result corresponds to reality is more a question of taste than science.
Fortunately, you only need to do this once per film type and lighting conditions. This means for a block of four films I only need to make the calibrations on a couple of images and then copy the results to the rest.

I am quite pleased with the results, which seem to match what I was hoping for. That said, I still have a strong aversion to the chemicals used for the processing (the Blix being particularly deadly to any clothing it comes in to contact with…) and so I think the next step must be to determine whether or not analogue filters applied over a digital image can achieve essentially the same effect…
Categories: Film, Photography

Marvellous, very much enjoyed seeing another side of Barcelona, away from the tourists.